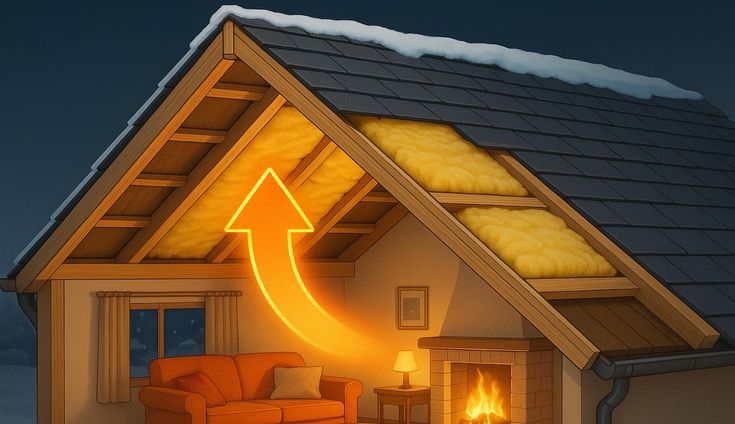
Older Australian homes lose a disproportionate amount of heat during winter. The Australian Housing Data Portal records an average energy rating of 2.2 stars out of 10, and uncontrolled air movement can waste up to 20 % of heating energy. The following winter‑warm‑up checklist focuses on quick‑win DIY actions and high‑impact upgrades that respect the historic character of a house while delivering measurable savings.
1. Seal the Envelope First
Windows and doors are the biggest culprits – roughly 40 % of winter heat loss comes from unsealed openings. Address these areas before tackling larger projects.
- Heavy, lined curtains: Close them at night to add up to 15 % thermal resistance.
- Caulking and silicone sealant: Fill cracks around window frames, door jambs, and service penetrations.
- Weather‑stripping: Apply adhesive strips to bottom and sides of doors; a simple “door snake” can block the remaining gap.
- Pelmets and window film: Install pelmets to reduce convection and add reflective film to cut solar heat loss.
- Vent covers: Temporarily block fixed ceiling or wall vents with insulated covers during the heating season.
2. Boost Floor and Ceiling Insulation
Raised timber floors and uninsulated ceilings create a cold‑air tunnel beneath the living space. Low‑cost options include:
- Lay area rugs or low‑pile carpet on exposed floorboards.
- Replace uninsulated downlights with insulated LED fixtures to eliminate thermal bridges.
- If budget allows, add blown‑in cellulose to the attic; a 10‑cm layer raises the R‑value by roughly 2.5.
3. Capture Passive Solar Gains
In the Southern Hemisphere, north‑ and west‑facing windows receive the most winter sun. Simple behavioural changes can raise indoor temperature by 1–2 °C.
- Keep blinds or curtains open during daylight hours.
- Trim overhanging vegetation that blocks winter sun.
- For longer‑term gains, consider double‑glazed windows, low‑e films, or external shading devices.
4. DIY Air‑Sealing Checklist
Even after the major envelope work, small gaps remain. The table below lists typical leak sources and the recommended DIY fix.
Leak SourceTypical SizeRecommended SealWindow frame cracks1‑3 mmSilicone caulkElectrical outlet gaps5‑10 mmFoam outlet gasketsPipe penetrations2‑5 mmExpanding foamDoor bottom gaps5‑15 mmAdhesive weather‑stripVentilation grilles10‑20 mmAdjustable vent cover Perform a candle test after sealing: a steady flame that flickers indicates a remaining draft.
5. Upgrade Windows (High‑Impact Investment)
Replacing 3 mm single‑glazed aluminium frames with double‑glazed units cuts conductive heat loss by 40‑50 % and reduces external noise. If full replacement is not feasible, install thermal curtains or removable window film to achieve a 10‑15 % reduction.
6. Add Cavity and Under‑Floor Insulation
Uninsulated walls can dissipate up to 25 % of a home’s heat energy. Installing rockwool or cellulose cavity insulation brings wall R‑values to the NCC minimum (R‑2.5 for external walls in most states). For timber stumps, lay a 50‑mm foam board under the floorboards or simply add a thick rug for an immediate effect.
7. Choose Efficient Heating Sources
After the envelope is sealed, the heating system can operate more efficiently.
- Refurbished wood‑burning fireplace: Provides steady, low‑cost heat; ensure the damper is closed when not in use.
- Modern split‑system air‑conditioner: Replaces old evaporative units; seal the old vent before installation to improve airtightness.
- Smart thermostat: Programmable setbacks of 8 hours per day can save up to 10 % on annual heating costs.
8. Verify Rebates and Compliance
Many Australian states offer rebates for insulation, weather‑proofing, and window upgrades. Before starting work, confirm eligibility for schemes such as NSW Home Energy Savings Scheme or Victoria’s Energy Saver Incentive. All modifications must meet the National Construction Code (NCC) – especially fire‑safety clearances around gas appliances and vent sealing.
9. Quick‑Win Checklist Summary
ActionTypical SavingsCost (AU$)Install weather‑stripping & door snakes5‑10 %30‑80Caulk window and wall cracks3‑5 %20‑50Add heavy curtains5‑7 %40‑120Lay area rugs on raised floors2‑4 %50‑200Seal vents with insulated covers2‑3 %25‑70Install outlet gaskets1‑2 %15‑30Upgrade to double‑glazed windows40‑50 %2,000‑5,000 per windowBlown‑in wall insulation10‑15 %1,200‑2,500Smart thermostat8‑10 %180‑350 Prioritising the low‑cost items first delivers near‑instant comfort while you arrange financing for larger upgrades.
For a deeper dive on cavity‑wall insulation options, see our Insulation Guide.
Need help selecting the right double‑glazed window for your heritage home? Visit our Window Replacement page.
Planning a home upgrade or insulation project? Contact our ProNestCX team for a free, no‑obligation consultation and a personalised savings estimate.
Assessing Long-Term Energy Savings
When investing in home upgrades, initial installation costs are only part of the equation. Homeowners must weigh upfront expenses against long-term utility bill reductions, thermal performance gains, and potential property value increases.
Material Quality and Durability Standards
Choosing high-performance materials—such as energy-efficient window glazing, advanced insulation fibers, or weather-resistant roofing—ensures structural longevity and minimizes ongoing maintenance overhead.
Assessing Professional Installation vs. DIY
While minor cosmetic updates can be handled independently, major efficiency retrofits require specialized expertise. Professional installation ensures compliance with local building codes and protects manufacturer warranties.
Project Timelines and Weather Windows
Home improvement schedules vary based on project scope and seasonal conditions. Proper planning ensures that exterior renovations or weatherproofing initiatives are completed efficiently without disrupting daily routines.
Maximizing Rebates and Financing Incentives
Many regional and federal programs offer tax credits or rebates for energy-efficient home upgrades. Evaluating these financial incentives early can significantly offset total project costs.
Warranty Coverage and Quality Assurance
Reliable service providers back their installations with comprehensive workmanship guarantees and manufacturer warranties, giving homeowners long-term peace of mind.
Ultimately, a successful home improvement project should enhance your property's daily comfort, boost energy efficiency, and provide long-lasting value for years to come.
Ultimately, a successful home improvement project should enhance your property's daily comfort, boost energy efficiency, and provide long-lasting value for years to come.
Ultimately, a successful home improvement project should enhance your property's daily comfort, boost energy efficiency, and provide long-lasting value for years to come.
Ultimately, a successful home improvement project should enhance your property's daily comfort, boost energy efficiency, and provide long-lasting value for years to come.
Ultimately, a successful home improvement project should enhance your property's daily comfort, boost energy efficiency, and provide long-lasting value for years to come.


